I always thought that using our own custom solutions over the ready ones is not necessary but genuine idea because we face with an unknown in other words real challenge. I used to write my articles using Obsidian and manually update the DB so far.
It turns out actively using this app to write and manage my technical articles. Just like this one 😅
Check out the Github repo for the source code.
Introduction
The open-source Ultimate Blog Editor App brings together the Markdown editing experience of Obsidian and the publishing flexibility of Substack in a single workspace.
The stack doesn't cost a penny. Supabase and Netlify free plans are suitable. It won't let you down halfway through even at scale.
That said, it comes with amazing features listed down below:
- Rich-Text Editing
- Blazing Fast Editing
- Markdown Editing Mode
- MDX Content Viewer
- Dynamic Error Display for Compiled MDX Source
- Media Library
- Image Optimization (converting primary formats to .webp)
- Extensive Autocomplete In English
- Custom Content Components (including charts from recharts)
- Command Center
- 50+ Predefined Eye Soothing Backgrounds
- Draft & Post Management
- Document Serialization and Compression
- URL-Based Document State
- Comprehensive Keyboard Shortcuts With Full Accessibility Support
- Dialogs, Sheets, Shared Controls
- Feedback and Cloud Syncing
- Backend Integration
This project is primarily tailored for my personal use, but it is also intended to serve as a reference for others interested in the editor architecture and development of editor features. It's so easy to change the serialized custom components and allowing you to curate them as you wish.
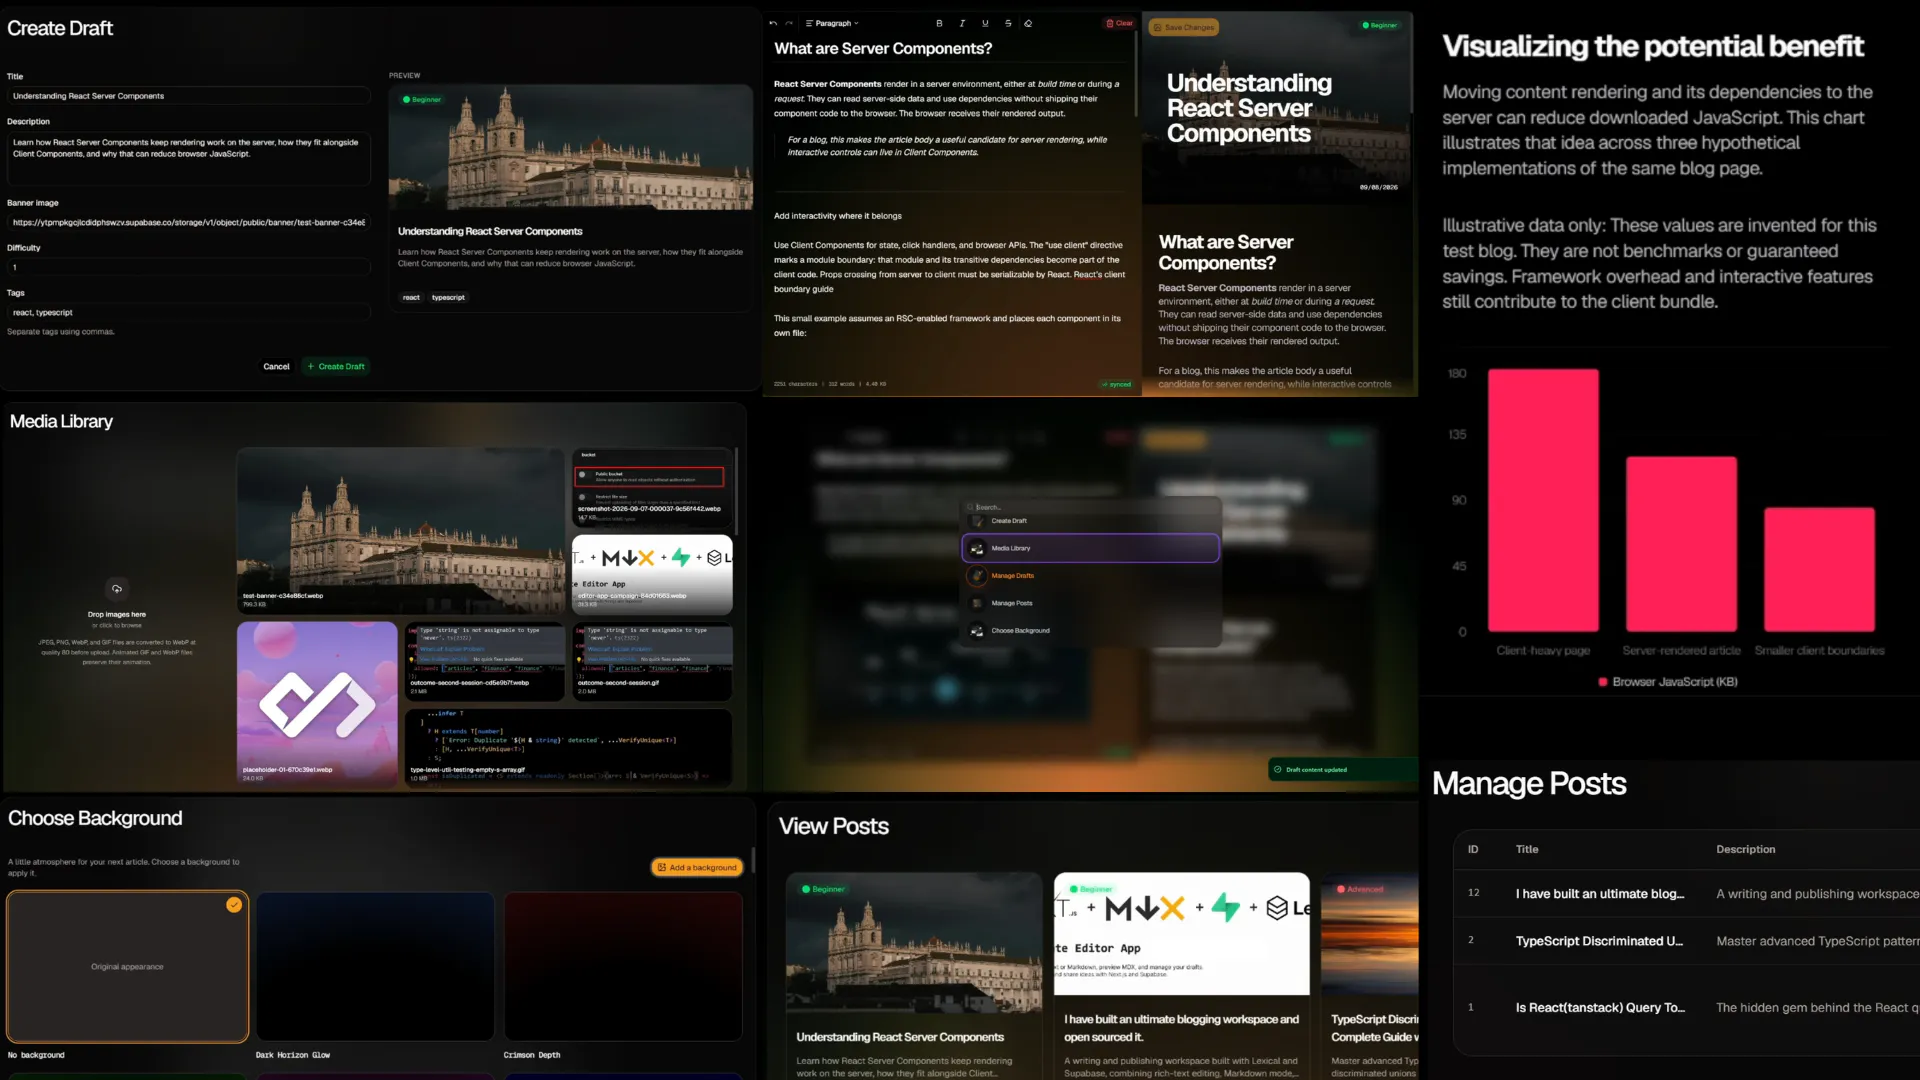
It serve as a starting point for building custom editor apps with its highly modular architecture and extensibility. Just like a puzzle box, it can be customized to fit your needs.
| tech | version |
|---|---|
| Next.js | ≥16 |
| React / React DOM | >19 |
| TypeScript | ≥5.0 |
| Lexical | ≥0.49.0 |
| Supabase JS | ≥2.112.3 |
| Tailwind CSS | ≥4.0.0 |
| shadcn | ≥4.19.0 |
| Base UI | ≥1.7.0 |
| next-mdx-remote-client | ≥2.1.12 |
| React Hook Form | ≥7.87.0 |
| Zod | ≥4.5.4 |
Motivation
Of course, those who rely on others' solutions rather than coming up with their own in 2026 are not fools or timid. What I mean is that whatever Substack or Obsidian provides is maybe convenient enough for you.
Therefore you might not end up with going further, it's totally up to you.
As far as I am concerned, these techs don't meet my expectations on their own, but would meet them if they were combined, if you're the one looking from the same window like me then you've come to the right place.
Architecture
The app follows a modular architecture that separates editing, document previews, and content management into dedicated feature areas. Shared UI components, an extensible Lexical editor, and centralized server actions keep the code organized and make it easier to maintain and expand. Respected to DRY principles heavily.
- Admin entry point(mainland): app/(admin)/admin/page.tsx provides the admin route, with access-control logic organized in proxy.ts and lib/auth.ts.
- Feature modules: features/ separates the editor, document viewer, and management tools for drafts, posts, and the media library.
- Extensible editor: components/editor/ organizes Lexical nodes, plugins, extensions, toolbars, and Markdown transformers. Charts and Contents have dedicated modules for editing, rendering, and conversion.
- MDX rendering: components/mdx/ defines content components and processing plugins, while lib/mdx/ handles serialization and related error handling.
- Server and DB layer: app/actions/ groups content operations, supported by the server database client in lib/db/ and generated database types in types/.
- State and validation: store/document.store.ts holds document state, providers/tools-provider.tsx supplies shared tool context, and schema/ defines draft validation.
- Shared interface: components/ui/, reusable modals, and hooks/ provide consistent controls, dialogs, keyboard shortcuts, and URL parameter handling.
The working tree is pretty straightforward and scalable with it's modular design:
Installation
1. Requirements
You will need:
- Node.js >= 22
- npm
Clone the repository:
Install dependencies:
⚠️ CAUTION: Before continuing further you must configure the DB layer. Do not attempt running the dev server unless all the database environments and tables are configured properly. See instructions below to be able to start the dev server.
2. Database Configuration
Visit Supabase auth page to signup or if you have already an account simply login. Create a new organization and choose your own namespace. After that, create a table called blog_posts and paste the given PostgreSQL snippet below into the SQL Editor section placed in the sidebar of your dashboard.
This will create our very first table for our articles.
After configuring the DB and ensuring everything is stable, you can curate the predefined tables however you want.
Next, we need the secondary table for our article candidates that isn't actually ready to be considered under the category of posts. I call it draft.
Paste the given snippet below to create draft table into the SQL Editor as well.
These tables are almost identical. The only difference is the partially defined columns, which are in response to the separation of concerns principle.
Finally, we're one step away to be done on DB configuration which is creating a bucket called banner. To do that, move into the storage page via dashboard > sidebar and create a new bucket called banner.
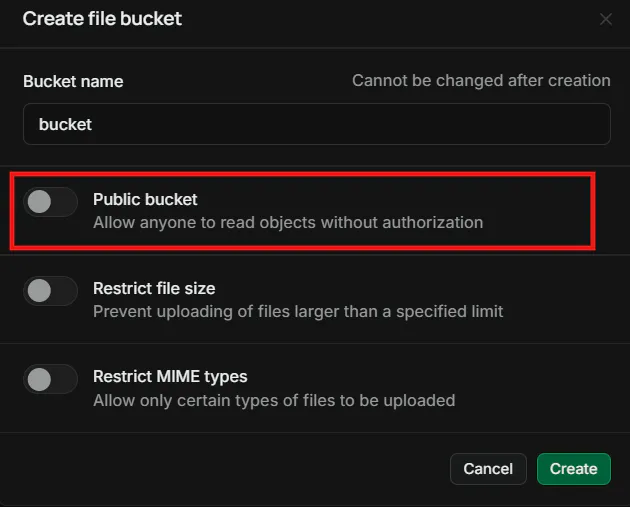
I'm currently using my bucket publicly because I treat my bucket as an external CDN point for my media elements in my site — idc how unsafe it is so if you think that things in it must remain private then you can leave the toggle state as-is like the one showed above.
3. Environment Configuration
Create a brand new env file called .env at the root of your project and get the corresponding values of your env keys from project settings of your Supabase organization.
After obtaining your DB tokens, replace the placeholder above and only if you do consider to deploy the app to the production, set APP_TOKEN to base64 formatted hash. You can visit this site to generate one in seconds.
4. Database Types
The app uses the typegen for DB types for in particular for React actions. Everything in the package.json file is configured for you to invoke codegen but before doing so, you must login to your Supabase account via CLI
Run the CLI command to login your account in your IDE.
This is going to open up a new window inside of your browser to SSO. Follow the instructions given in the CLI to login then run the following command to fetch the DB types
5. Running the App
Start the development server:
The current development script starts Next.js on port 36805:
That's pretty much everything so far to run the app on locally, it takes max 5 minutes from scratch, I think it's fair.
Usage & Writing Your First Article
Important Note for Unix-Based OS Developers
It's worth to mention that the Unix-based users like mac or linux OS a bit differs in particular scenarios such as key bindings. If you're the one, you may want to configure the app shortcuts in a way that the modifier key meta handles the shortcut over Control because initially it's defined to Control — yes, I'm a windows user.
Simply find the components in your IDE search with a match for the hook imported as:
And configure like:
Command Center & Shortcuts
Consider Ctrl as Meta please Linux & Mac folks
Press Ctrl + K to toggle the Command Center, even while editing. Search for a tool, navigate with ↑ / ↓, and press Enter to open its modal. Selecting a tool automatically closes the Command Center.
| Shortcut | Action |
|---|---|
| Ctrl + K | Toggle the Command Center |
| ↑ / ↓ | Navigate tools |
| Enter | Open the selected tool |
| Esc | Dismiss the active dialog |
| Available tools: View Posts, View Drafts, Create Draft, Media Library, Manage Drafts, and Manage Posts. |
| Shortcut | Purpose |
|---|---|
| Ctrl + M | Toggle between rich-text editing and Markdown mode. |
| Ctrl + / | Show or hide the document viewer. Requires a selected post or draft. |
| Ctrl + S | Save content changes to the selected draft or post while the document viewer is mounted. |
If you'd like to publish the posts powered by SSG render power in Next.js Pages router that maximizes your SEO by god knows how many times, you can take a look at my blog app's Github Repo to inspire by.
Contributing
Contributions are welcome! Open an issue to report a bug, suggest a feature, or discuss a significant change before starting.
- Fork the repository and create a branch for your changes.
- Install dependencies with npm install.
- Start the development server with npm run dev.
- Make your changes, keeping them focused and consistent with the existing architecture.
- Run npm run check and npm run build before submitting.
- Open a pull request describing the changes, any related issues, and how you tested
- them. Include screenshots for UI updates.
Keep credentials and environment files out of your commits.
Acknowledgements
Huge thanks to this repo and its hard-working contributors for allowing me to curate their Shadcn Editor! Lovely set of backgrounds are also scraped from patterns craft definitely worth to add in your checklist.